🧠 Introduction
Kali Linux is a powerful, Debian-based operating system built specifically for penetration testing, digital forensics, and cybersecurity research. Packed with hundreds of pre-installed tools, it’s a favorite among ethical hackers and security professionals.
But installing Kali directly on your main system might not be the best idea—especially if you’re just starting out. Running Kali in a virtual machine (VM) gives you a safer and more flexible environment to experiment and learn.
In this quick guide, you’ll learn how to set up Kali Linux inside Oracle VirtualBox in under 30 minutes using a prebuilt virtual machine image.
🛠️ Tools and Requirements
To follow along, you’ll need the following:
- Host Operating System: Windows, macOS, or Linux
- Minimum System Requirements:
- At least 4GB RAM (8GB+ recommended)
- Minimum 20GB free disk space
🔽 Software Downloads:
⏱️ Quick Setup in Under 30 Minutes
1️⃣ Download Kali Linux via Torrent Using aria2
To save bandwidth and ensure a reliable download, the Kali Linux team provides .torrent files for all images — including the VirtualBox version.
Follow these steps:
🌀 Step 1: Get the Torrent File
- Visit the official Kali Linux download page:
👉 https://www.kali.org/get-kali/#kali-virtual-machines - Under the VirtualBox section, click “Torrent” to download the
.torrentfile for the 64-bit image.
🔽 Step 2: Install aria2 (Torrent client)
If you’re on Debian or any Debian-based distro:
udo apt update
sudo apt install aria2
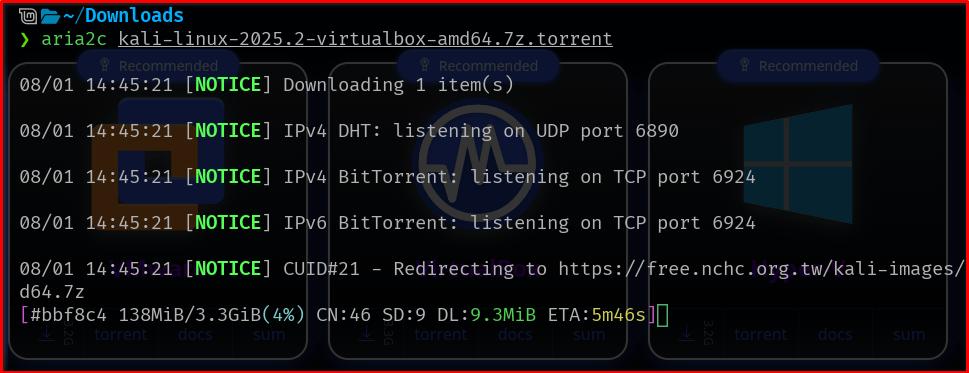
📥 Step 3: Download the Kali image via aria2
aria2c kali-linux-202x.x-virtualbox-amd64.7z.torrent
Replace the filename with the exact name of the
.torrentfile you downloaded.
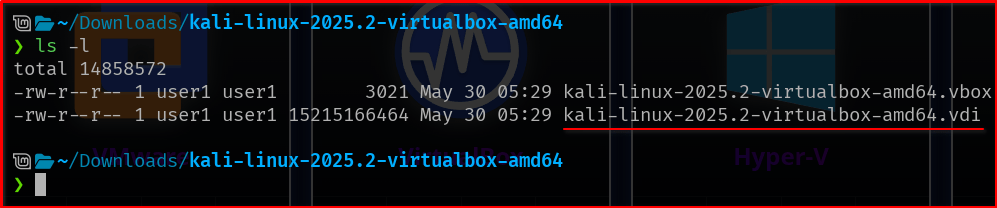
Once the download completes, you will have a .7z archive containing Kali’s .vdi disk image.
2️⃣ Install Oracle VirtualBox
Download and install VirtualBox for your operating system:
- Launch the installer
- Proceed with the default options
- (Optional) Install the VirtualBox Extension Pack for USB and other enhancements
3️⃣ Extract the 7z Archive
To extract the .7z file, you can use 7-Zip on Windows or p7zip on Linux:
On Debian/Ubuntu:
sudo apt update
sudo apt install p7zip-full
7z x kali-linux-*.7z
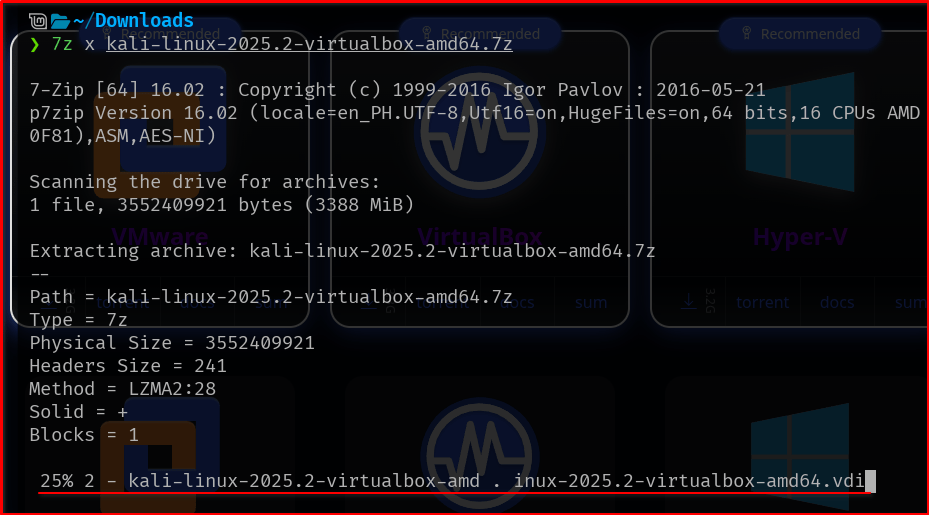
After extraction, you’ll see a folder containing the Kali .vdi file.
4️⃣ Create a New Virtual Machine in VirtualBox
– Open VirtualBox
– Click New
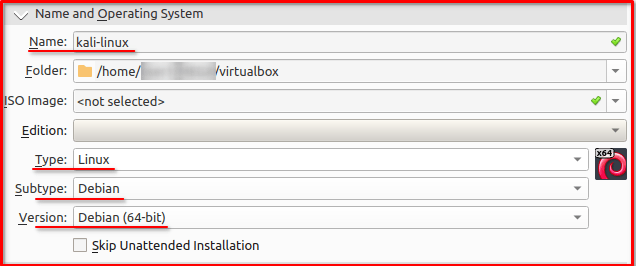
– Name: Kali Linux
– Type: Linux
– Version: Debian (64-bit)
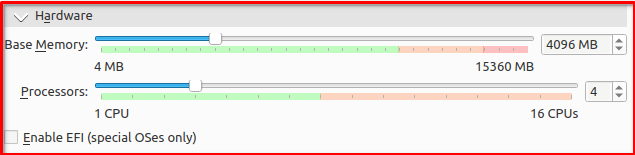
– Set memory (RAM): at least 2GB, 4GB+ recommended
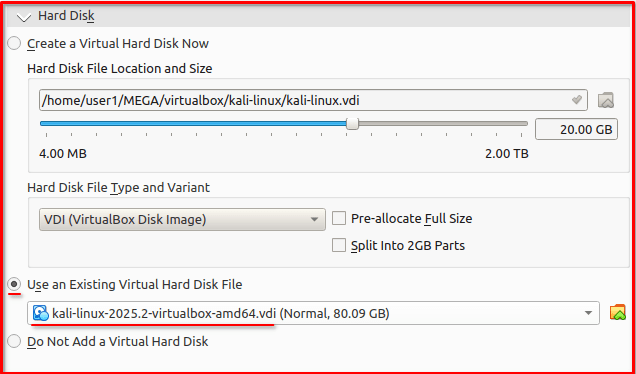
– Choose “Use an existing virtual hard disk file”
– Browse and select the extracted .vdi file
Click Create
5️⃣ Start the Kali VM
After the import finishes:
- Select the newly imported Kali Linux VM
- Click Start
Once booted, log in using the default credentials: kali/kali
🎉 You now have Kali Linux running on VirtualBox with a clean .vdi disk image!
💡 Tips to Maximize Your Kali VM
- Use Bridged Adapter for real-world network simulations
- Take frequent snapshots before major changes or updates
- Configure shared folders between host and VM for easy file transfer
- Consider creating a non-root user for everyday use
🏁 Conclusion
Setting up Kali Linux in a virtual machine doesn’t have to be intimidating or time-consuming. By using the official prebuilt VDI and Oracle VirtualBox, you can have a full-featured penetration testing environment ready in less than 30 minutes.
Whether you’re preparing for a certification, exploring tools, or practicing your ethical hacking skills, this setup provides the safety and flexibility you need to learn effectively.