Introduction
In today’s digital landscape, network security and privacy have become paramount concerns for both home users and businesses. While individual VPN clients protect single devices, configuring a VPN at the router level provides comprehensive protection for your entire network. OPNsense, a powerful open-source firewall and routing platform, offers robust VPN capabilities that can be paired with reliable VPN services like Private Internet Access (PIA) to create a secure network infrastructure.
This comprehensive guide will walk you through the process of configuring PIA VPN on OPNsense, from initial setup to advanced firewall rules. Whether you’re looking to protect all network traffic, implement selective routing policies, or create a fail-safe kill switch, this tutorial covers everything you need to secure your network at the gateway level. By the end of this guide, you’ll have a fully functional VPN-protected network that ensures all connected devices benefit from encrypted internet access without requiring individual VPN clients.
Step by step instructions
Prerequisites
First, you’ll need your PIA credentials and server information:
- Your PIA username and password
- PIA OpenVPN configuration files (download from PIA’s website)
Note: This guide uses OPNsense version 25.7.2. Your configuration may vary depending on your specific use case and requirements.
Step 1: Import PIA Certificate Authority
- Go to System > Trust > Authorities
- Click Add to create a new CA
- Set Descriptive name to “PIA CA”
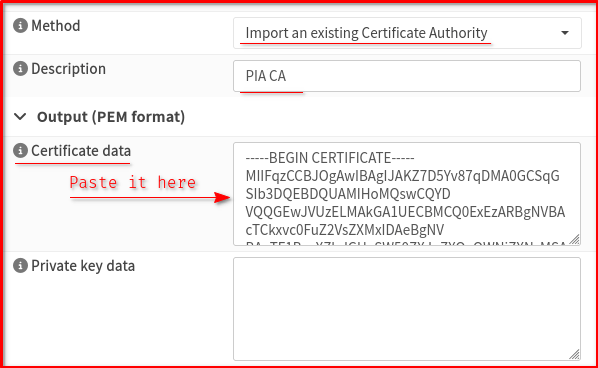
- Set Method to “Import an existing Certificate Authority”
- Copy and paste the PIA CA certificate from their .ovpn file (the content between
<ca>and</ca>tags) - Click Save
Step 2: Configure OpenVPN Client
- Go to VPN > OpenVPN > Intances
- Click Add to create a new instance
- Configure the following settings:
Basic Settings:
- Advanced Mode:: On (top right)
- Role:: Client
- Protocol: UDP <— Get from .ovpn file config
- Port number: 1198 <— Get from .ovpn file config
- Device Mode: tun (default)
- Verbosity: 3 Normal (default)
- Keep alive interval: blank (default)
- Keep alive timeout: blank (default)
- Remote: sg.privacy.network <— Get from .ovpn file config
- Certificate Authority: PIA CA (from step 1)
- Auth: SHA1 160-bit <— Get from .ovpn file config
- Description: PIA VPN
User Authentication:
- Username: Your PIA username
- Password: Your PIA password
Note: Keep the remaining parameters at their default settings and click ‘Save’
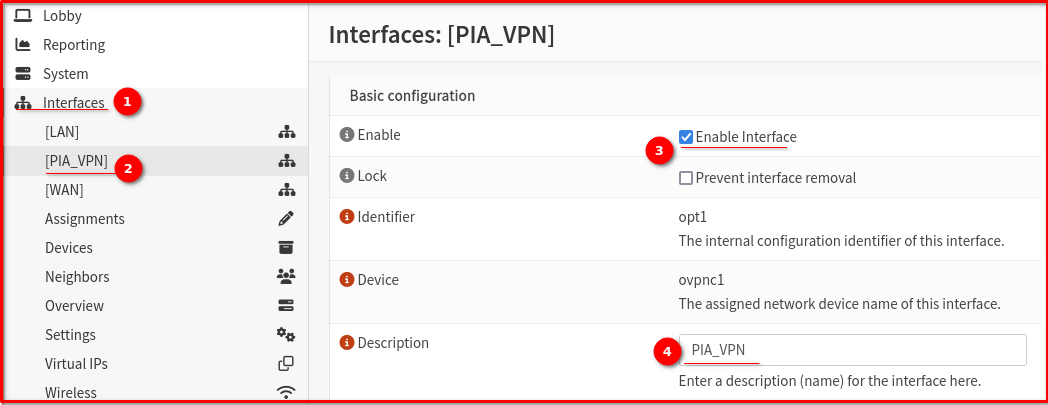
Step 3: Configure Interface
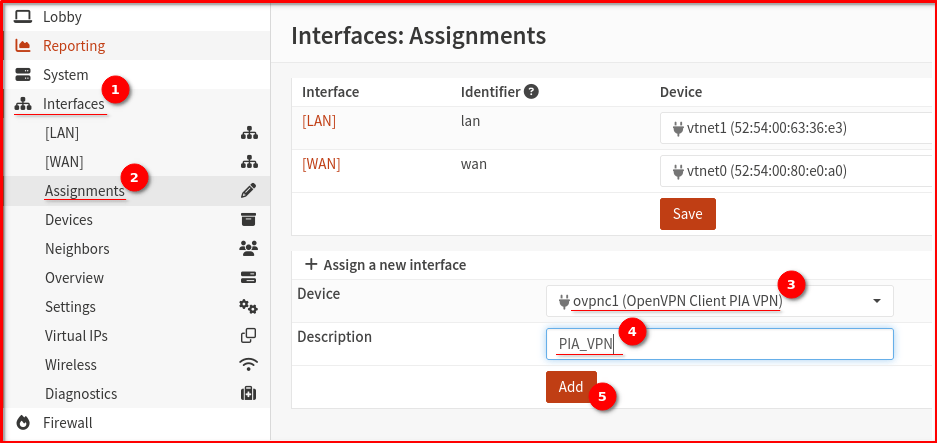
- Go to Interfaces > Assignments
- You should see a new interface for your OpenVPN client (ovpnc1)
- Click Add to assign it
- Click on the newly created interface (likely OPT1)
05. Enable Interface
06. Set Description to “PIA_VPN”
07. Keep the remaining parameters at their default settings then Click Save and Apply Changes
Step 4: Verify VPN Connection (Half-way stage now)
Just go to VPN —> OpenVPN —> Connection Status
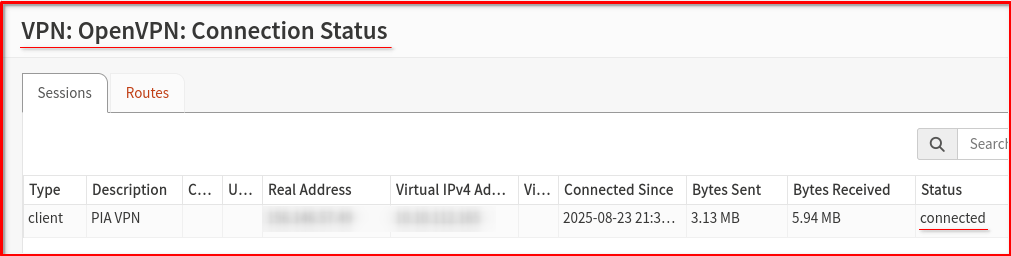
Status: VPN connection is established but LAN-to-VPN routing is NOT configured. Current public IP address reflects your local ISP rather than the VPN endpoint.
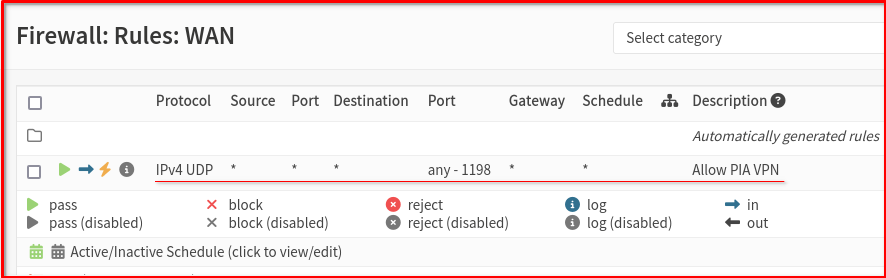
Step 5: Configure Firewall Rules
- Go to Firewall > Rules > WAN
- Add a rule to allow OpenVPN traffic:
- Action: Pass
- Protocol: UDP
- Destination port: 1198
- Description: Allow PIA VPN
What specific routing behavior are you looking for?
- Route all traffic through VPN?
- Only specific devices/traffic through VPN?
- Need a kill switch to prevent leaks?
We’ll set up the most common VPN configuration—routing all your traffic through the VPN—plus add a kill switch for extra protection.
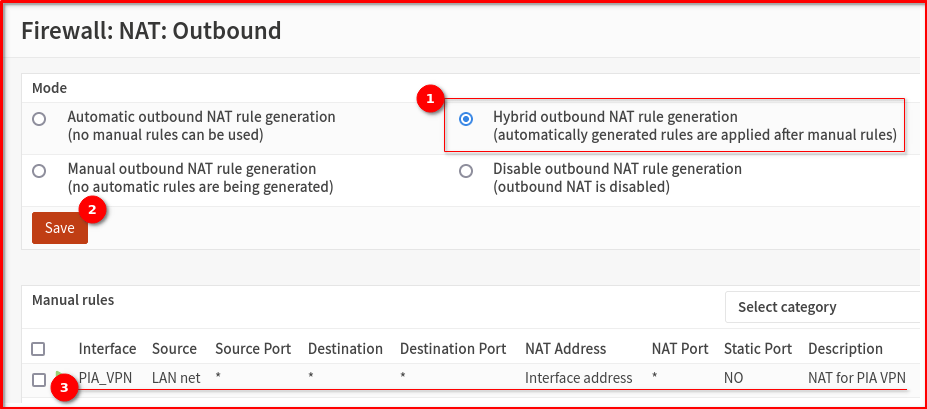
Step 6: Outbound NAT Rules
- Go to Firewall > NAT > Outbound
- Change mode to Hybrid outbound NAT rule generation then click Save
- You should see existing Automatic rules and Manual rules
- Add a new NAT rule with these settings:
- Interface: PIA_VPN (your VPN interface)
- Source: LAN net (e.g., 192.168.1.0/24)
- Translation: Interface address
- Description: NAT for PIA VPN
- Keep the remaining parameters at their default settings then Click Save and Apply Changes
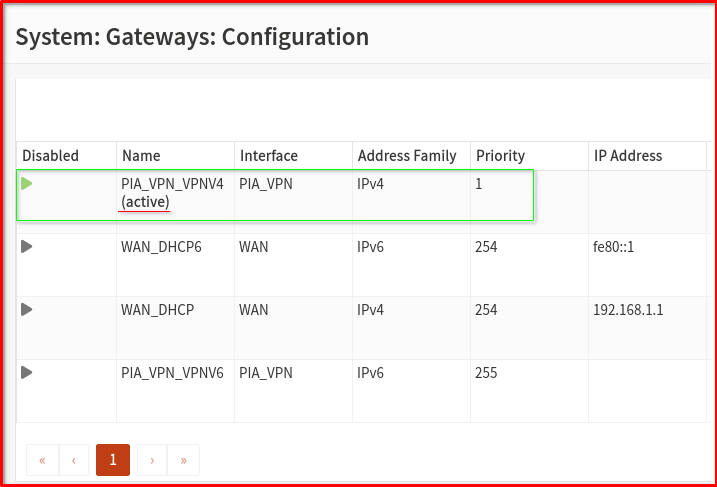
Step 7: Gateway Configuration (Implement Kill Switch)
- Go to System > Gateways > Configuration
- Disable the all gateway except for PIA_VPN_VPN4
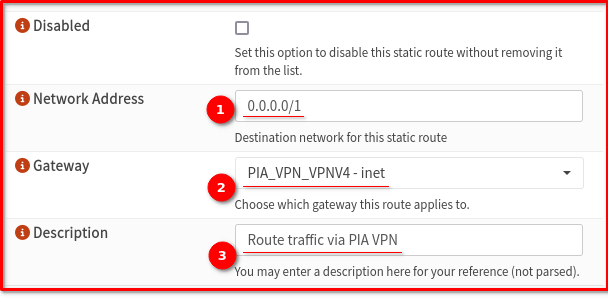
Step 8: Default Route via VPN
- Go to System > Routes > Configuration
- Add a new route:
- Destination network: 0.0.0.0/1
- Gateway: Select your PIA VPN gateway
- Description: Route traffic via PIA VPN
Other Things to Consider
DNS Configuration
- Best practice when you use OPNsense just utilize the built-in security features of Unbound DNS
- Configure OPNsense to use DNS-over-TLS (DoT) as outlined in my previous blog post: ‘Enabling DNS-over-TLS (DoT)
- Skip the VPN DNS option and don’t worry about DNS leak tests saying your DNS is leaking—those results aren’t reliable.
Testing Your Configuration
- Check your external IP from a device on your network
- Test for DNS leaks at dnsleaktest.com to get the result of your current public IP Address and DNS
- Test the kill switch by stopping the VPN client and ensuring no internet access
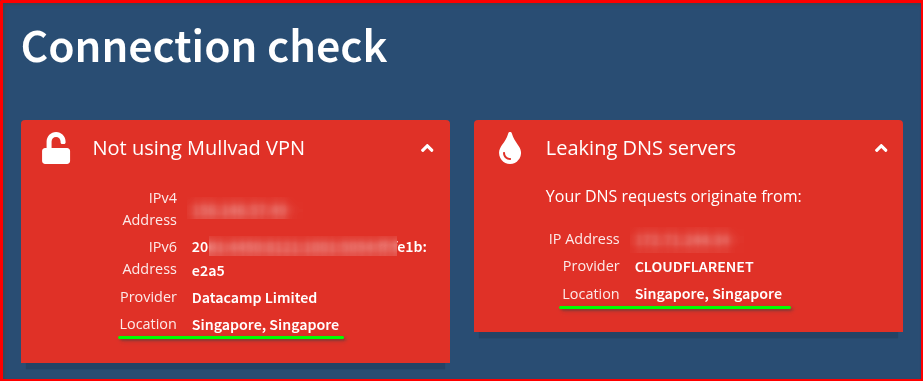
I use https://mullvad.net/en/check to verify my public IP address and confirm I’m using Cloudflare DoT for DNS. There are other DNS leak testing websites available through Google—feel free to explore and compare your results
Switch to Local ISP
Simply revert the configuration settings from Steps 5 through 8, or you can disable them entirely. Practice switching these settings back and forth to gain valuable hands-on knowledge
Final Thoughts
Configuring Private Internet Access VPN on OPNsense represents a significant step forward in network security and privacy protection. By implementing VPN functionality at the router level, you’ve created a comprehensive security solution that protects all devices on your network automatically, eliminates the need for individual VPN clients, and provides centralized management of your privacy policies.
The flexibility of OPNsense allows you to customize your VPN implementation according to your specific needs – whether that’s routing all traffic through the VPN tunnel, implementing selective policies for different devices, or creating robust kill switches to prevent data leaks. The firewall rules we’ve configured ensure that your traffic flows securely and efficiently through the encrypted tunnel while maintaining the ability to manage and monitor your network traffic.
Remember that network security is an ongoing process. Regularly update your OPNsense installation, monitor your VPN connection status, and periodically test your configuration to ensure optimal performance and security. Consider implementing additional security measures such as DNS filtering, intrusion detection, and regular security audits to further strengthen your network’s defenses.
With your OPNsense and PIA VPN configuration now in place, you can enjoy peace of mind knowing that your entire network is protected by enterprise-grade security measures, all while maintaining the flexibility and control that open-source solutions provide.