Introduction
Welcome back to our web application security series! In our previous blog post, “Brute-Force Testing with Hydra on Flask”, we delved into the mechanics of brute-force attacks and demonstrated how to leverage the powerful command-line tool Hydra against a vulnerable Flask login page. We used a consistent Flask program and the same user and password lists, laying the groundwork for understanding this common web vulnerability.
In this installment, we’re shifting our focus to a more comprehensive and feature-rich tool: OWASP ZAP (Zed Attack Proxy). While Hydra excels in its dedicated brute-forcing capabilities, ZAP offers a full-fledged environment for web application security testing, including a robust “Fuzzer” that is perfectly suited for simulating brute-force attacks.
This guide will walk you through the practical steps of setting up and executing a brute-force attack on the same vulnerable Flask login page that we used previously, but this time, entirely within the OWASP ZAP ecosystem. We will continue to use our familiar Flask application and the very same username and password lists, allowing for a direct comparison of methodologies between Hydra and ZAP.
For those new to OWASP ZAP or looking to refresh their knowledge of its core functionalities, we highly recommend visiting this resource to understand its fundamental concepts before proceeding. By the end of this guide, you’ll have a clear understanding of how to effectively wield ZAP’s brute-forcing capabilities to test the resilience of authentication mechanisms in Flask applications.
OWASP ZAP: The Fuzzer
Here’s how ZAP handles brute-forcing and related concepts:
Fuzzer: This is ZAP’s primary tool for performing brute-force and dictionary attacks. The Fuzzer allows you to:
- Select injection points: You can choose specific parameters in a request (e.g., username, password, session ID, custom headers) where you want to inject your payloads.
- Define payloads: You can load wordlists (dictionaries), generate numeric or character sequences, use files, or even create custom payloads. This is where you’d feed your lists of usernames and passwords for a login brute-force.
- Analyze responses: You can configure rules to analyze the responses from the server. This is crucial for identifying successful logins or other desired outcomes. ZAP allows you to define success/failure indicators based on:
- Status codes (e.g., 200 OK, 302 Redirect, 401 Unauthorized)
- Content length
- Size Resp. Body
How to use ZAP for a Login Brute-Force (Detailed Steps):
To leverage OWASP ZAP for a brute-force attack, we’ll guide it to intercept our application’s traffic and then utilize its Fuzzer feature.
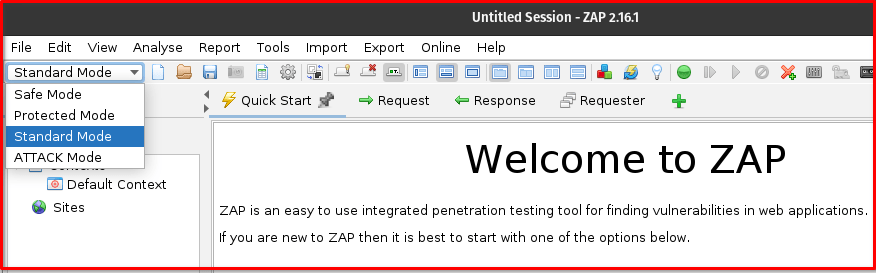
Step 1: Set ZAP to Standard Mode: Before you begin, ensure ZAP is operating in Standard Mode. The Fuzzer, which we’ll use for brute-forcing, is not available in “Safe” or “Protected” modes. You can change the mode via the “Mode” dropdown menu in the ZAP toolbar (typically top-left).
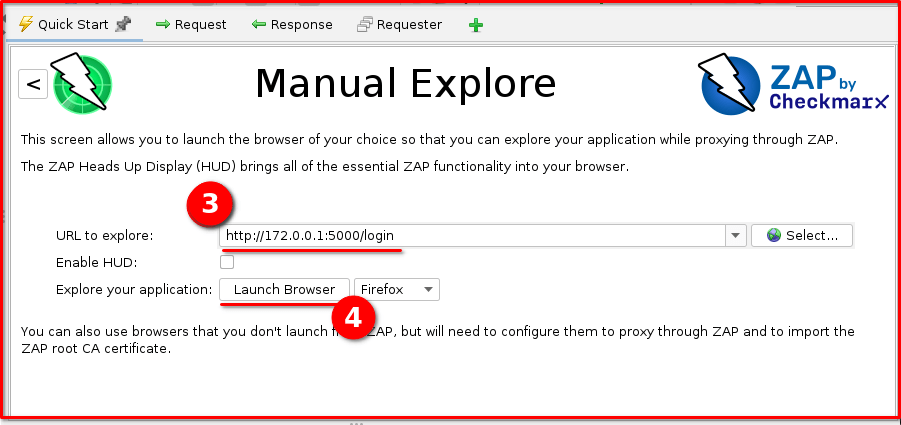
Step 2: Start Manual Explore: From the “Quick Start” tab in ZAP, select “Manual Explore.” This will allow ZAP to act as a proxy and capture your browser’s traffic.

Step 3: Navigate to the Login Page: In the “URL to Explore” field, enter https://127.0.0.1:5000/login (our vulnerable Flask application’s login URL). A browser instance configured to proxy through ZAP will then pop up, navigating to this address.
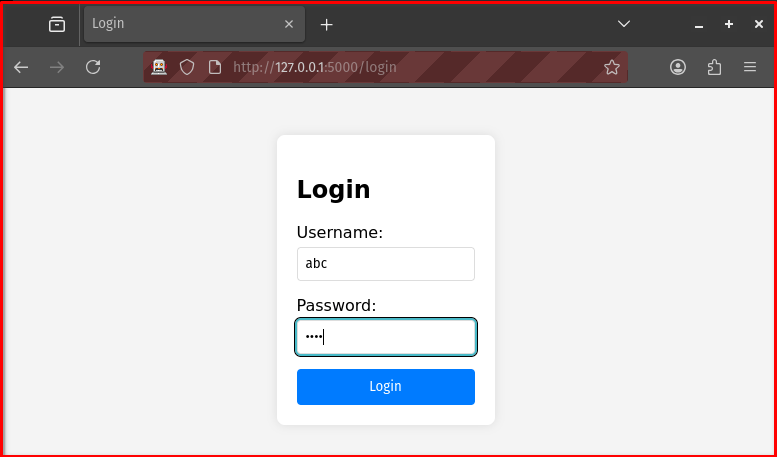
Step 4: Perform a Login Attempt: In the opened browser, enter any arbitrary (even incorrect) username and password (e.g., abc/pass) into the Flask login page and submit the form. This action is crucial as it generates the HTTP POST request that ZAP needs to capture.
Step 5: Locate the POST Request in ZAP’s History: Switch back to the OWASP ZAP interface. In the “History” tab (usually on the left panel), locate the HTTP POST request that corresponds to your login attempt. This request will show the details of the form submission, including the username and password parameters.
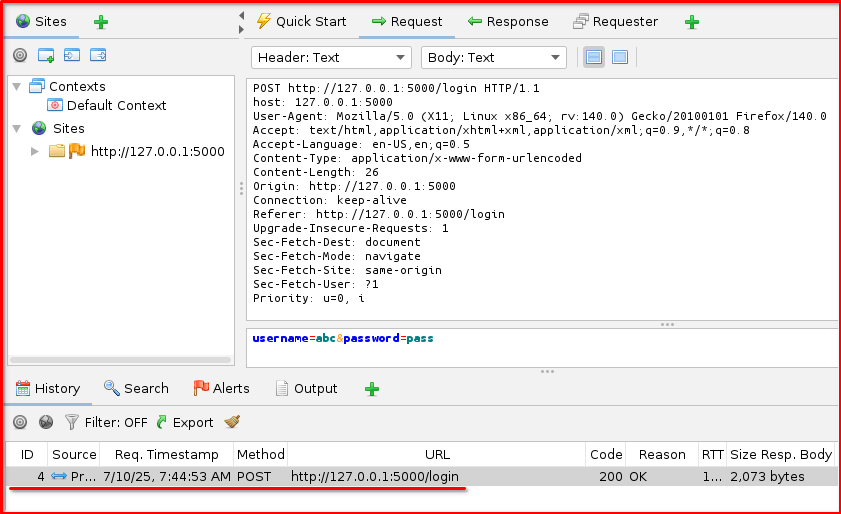
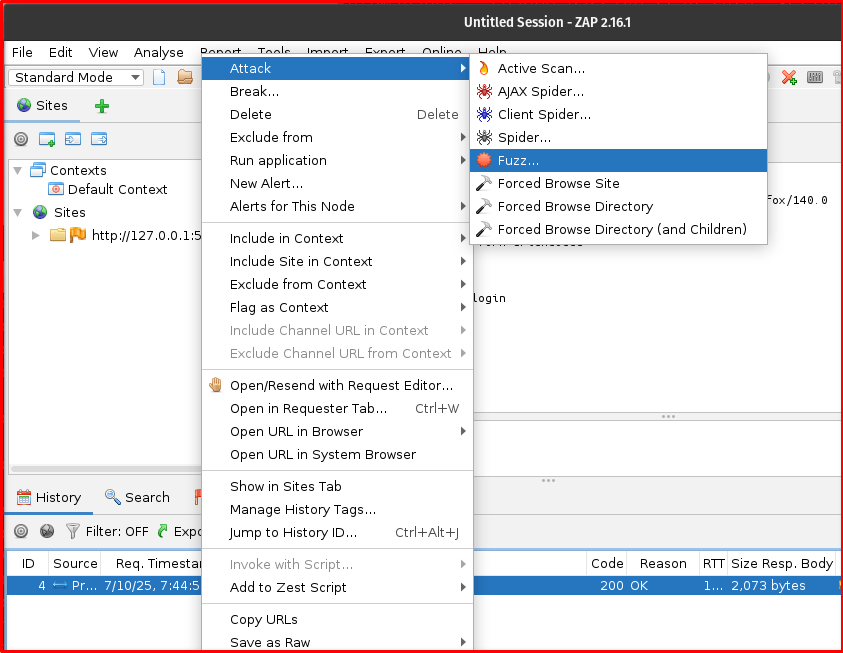
Step 6: Send to Fuzzer: Right-click on this identified POST request in the “History” tab and select “Fuzz…” from the context menu. This action will open the Fuzzer dialog, pre-populated with the captured request details.
Step 7: Identify Injection Points: In the Fuzzer dialog, you’ll see the raw request. Highlight the value of the username parameter (e.g., the abc in username=abc) and click the “Add” button to define it as an injection point. Repeat this process for the password parameter’s value (e.g., the pass in password=pass).

Step 8: Add Payloads (Usernames and Passwords): For each of the injection points you just defined (username and password):
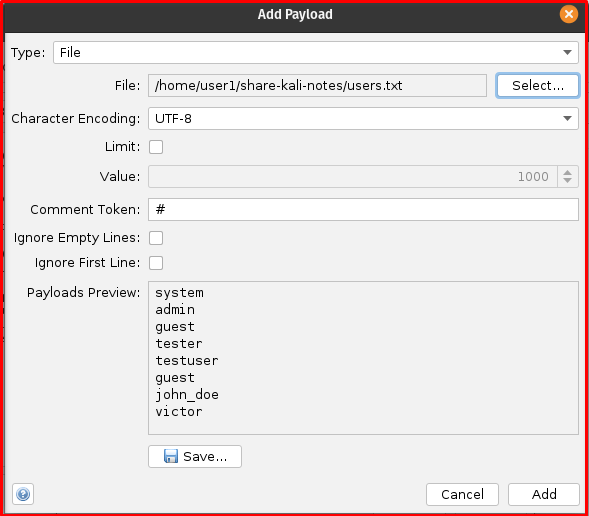
- In the “Payloads” section of the Fuzzer dialog, click the “Add…” button.
- Select “File” as the Payload Type.
- Browse and select your
usernames.txtfile for the username injection point and yourpasswords.txtfile for the password injection point. - Click “Add” for each file.
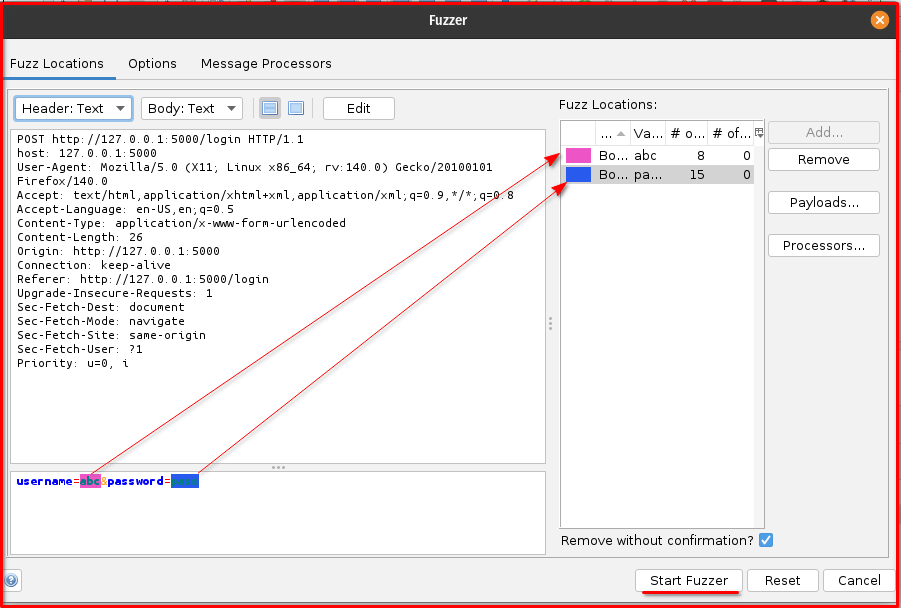
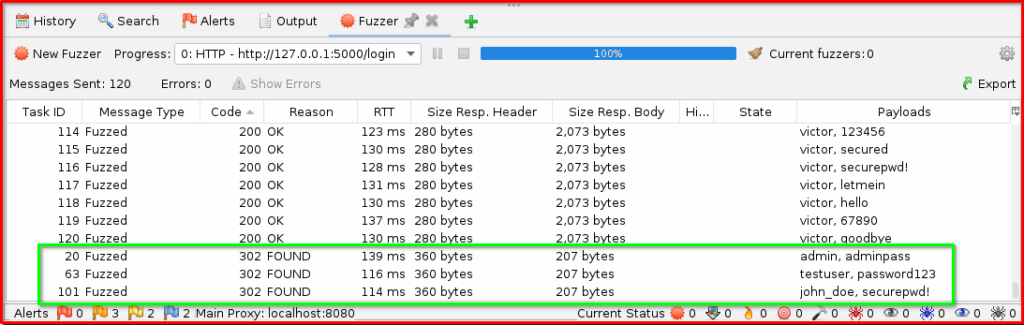
Step 9: Start Fuzzing: Once all settings are configured, click the “Start Fuzzer” button. ZAP will then begin sending requests, trying all the combinations of usernames and passwords, and reporting the results in the Fuzzer tab based on your defined success/failure indicators. Pay close attention to the “Code” and “Reason” columns, as well as the “Size Resp. Body” tab for each result, to identify valid credentials.
Final Thoughts
OWASP ZAP is a very capable tool for brute-force attacks, particularly through its Fuzzer component, which offers granular control over payloads and response analysis. It’s an excellent alternative to dedicated tools like Hydra, especially if you’re already using ZAP for other web application security testing.