Introduction
Do you ever find yourself typing long, cumbersome SSH commands, replete with usernames, IP addresses, and obscure port numbers? We’ve all been there. It’s a recipe for typos, frustration, and wasted time. But what if I told you there’s a secret weapon in your SSH arsenal that can revolutionize your workflow, saving you countless keystrokes and headaches?
That secret weapon is the .ssh/config file.
As someone who’s relied on this setup for over five years across various environments, I can tell you it’s a game-changer. The best part? The principles you’ll learn for leveraging this powerful configuration file apply universally across Linux, macOS, and even Windows. That’s right—SSH has been a native part of Windows since at least Windows 10 version 1803 (April 2018 Update), making these client-side configurations accessible to almost anyone with a modern operating system.
In this blog post, we’re going to demystify the .ssh/config file. We’ll start with the basics of setting it up, then dive into essential directives that will streamline your connections, and finally, explore some advanced tricks to truly supercharge your terminal life. Get ready to ditch the repetitive typing and embrace a more efficient, less error-prone way of connecting to your remote servers. Let’s dive in!
What Exactly IS .ssh/config? (The Basics)
Think of .ssh/config as your personal phonebook for SSH connections. It’s a plain text file nestled in your ~/.ssh/ directory (that’s the .ssh folder in your home directory) that allows you to define custom configurations for your SSH connections. Instead of remembering complex commands every time, you can set up shortcuts and preferences that SSH will automatically use.
When you type a simple command like ssh myserver, your SSH client smartly checks this .ssh/config file first. If it finds an entry that matches Host myserver, it will automatically apply all the configurations you’ve defined for it, like the correct hostname, username, port, and even the SSH key to use. It’s like having your contacts automatically fill in all the details when you dial a name!
Important Security Note: Because this file contains sensitive information (like which private key to use), it’s crucial to have the correct permissions set. Make sure only you have read and write access. You can do this in your terminal with the command:
chmod 600 ~/.ssh/config
This command ensures that only your user has permission to read and write to this file.
Setting Up Your First .ssh/config
Ready to create your own SSH magic? ✨ Here’s how to get started:
- Check if the directory exists: Open your terminal and navigate to your home directory (usually
cd ~). Then, list the files and folders withls -a. You should see a.sshdirectory. If not, you can create it withmkdir ~/.ssh. - Create the config file: Inside the
.sshdirectory, create an empty file namedconfig:touch ~/.ssh/config - Open the file for editing: Use your favorite text editor (like
nano,vim,gedit, or even Notepad on Windows) to open the~/.ssh/configfile. It will likely be empty to start.
Let’s add a basic configuration for a server you connect to frequently:
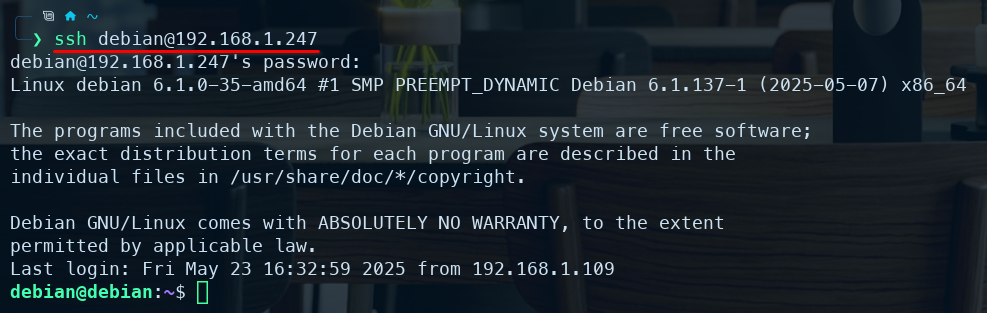
Host debian-vm                      # name of your remote server
    Hostname 192.168.1.247          # valid IP Address of remote server/host
    User debian                     # username of your remote server
In this example:
Hostdebian-vm: This defines a shortcut name as debian-vm. Now, instead of typing the full command, you can just usesshdebian-vm.Hostname 192.168.1.247: This specifies the actual IP address or domain name of the server.Userdebian: This sets the username you use to log in to that server.
Now, instead of typing:
You can simply type:

Essential .ssh/config Directives (with Real-World Examples)
The Host, Hostname, and User directives are just the beginning! Let’s explore some other incredibly useful options you can configure:
| Directive | Purpose | Example |
|---|---|---|
Host | Defines a shortcut name (alias) for your connection. | Host work-server, Host *.internal.com |
Hostname | The actual IP address or domain name of the remote server. | Hostname mydomain.com, Hostname 10.0.1.5 |
User | Specifies the username for the connection. | User deploy, User john.doe |
Port | Connects to a non-standard SSH port. | Port 2222 |
IdentityFile | Specifies the path to the private SSH key to use for this host. | IdentityFile ~/.ssh/id_rsa_project |
IdentitiesOnly | Prevents SSH from trying other keys if the specified IdentityFile fails. | IdentitiesOnly yes |
ProxyJump | Connects through an intermediary “bastion” host. | ProxyJump bastion.example.com |
ForwardAgent | Forwards your SSH agent connection to the remote server. | ForwardAgent yes |
LocalForward | Forwards a port from your local machine to a port on the remote server. | LocalForward 8080 localhost:80 |
RemoteForward | Forwards a port from the remote server to a port on your local machine. | RemoteForward 9000 localhost:3000 |
StrictHostKeyChecking | Controls whether SSH verifies the host key of the server. | StrictHostKeyChecking ask, StrictHostKeyChecking no |
ServerAliveInterval | Sends a null packet to the server to prevent timeouts. | ServerAliveInterval 60 |
ServerAliveCountMax | Number of server alive messages that can be sent without a response. | ServerAliveCountMax 3 |
Let’s look at some practical examples:
Example 1: Connecting to a server on a non-standard port with a specific key:
Host internal-app
    Hostname app.internal.example.com
    User appuser
    Port 34567
    IdentityFile ~/.ssh/id_rsa_internal_app
Now, ssh internal-app will automatically connect to app.internal.example.com on port 34567 using the private key ~/.ssh/id_rsa_internal_app and the username appuser. No more remembering those obscure details!
Example 2: Jumping through a bastion host:
Host bastion
    Hostname bastion.example.com
    User jumpuser
    IdentityFile ~/.ssh/id_rsa_bastion

Host private-server
    Hostname 10.0.1.15
    User appuser
    IdentityFile ~/.ssh/id_rsa_private
    ProxyJump bastion
Here, ssh private-server will first connect to bastion.example.com using the jumpuser and its key, and then tunnel through that connection to reach the private server at 10.0.1.15. This is crucial for accessing servers in private networks.
Example 3: Setting default options for all hosts:
You can use the wildcard * in the Host directive to set default options that apply to all your SSH connections:
Host *
    ServerAliveInterval 60
    ServerAliveCountMax 5
    ForwardAgent no # Disable agent forwarding by default
These settings will keep your SSH sessions alive longer and disable agent forwarding unless explicitly enabled for a specific host.
Security Considerations with .ssh/config
While .ssh/config enhances convenience, it’s important to be mindful of security:
- Permissions are paramount: As mentioned earlier, ensure your
~/.ssh/configfile has strict permissions (chmod 600). This prevents other users on your system from reading potentially sensitive information, like the private keys associated with yourIdentityFiledirectives. - Be cautious with
StrictHostKeyChecking: Disabling host key checking (StrictHostKeyChecking no) can make you vulnerable to man-in-the-middle attacks, as you won’t be verifying the authenticity of the server you’re connecting to. It’s generally recommended to keep it set toask(which prompts you to confirm new host keys) oryes(which strictly checks the known_hosts file). - Manage your private keys carefully: The
IdentityFiledirective tells SSH which private key to use. Ensure your private keys are securely stored and protected with a strong passphrase (if applicable). - Understand
ForwardAgentimplications: WhileForwardAgentis convenient for connecting from a remote server to another without copying your key, it also means that if the remote server is compromised, your forwarded agent could potentially be misused. Use it with caution and only when necessary. - Review your
configfile regularly: As you add more configurations, take some time to review your.ssh/configfile to ensure everything is still accurate and secure.
Advanced Tips and Tricks for .ssh/config Ninjas
Ready to level up your .ssh/config game? Here are a few more advanced techniques:
- Organizing with Comments: Use the
#symbol to add comments to yourconfigfile, explaining the purpose of differentHostblocks or specific directives. This makes your file easier to understand and maintain. - Wildcard Hosts for Organization: You can use wildcards like
Host *.internalto apply specific settings to all servers within your internal network. - Aliases for Different Scenarios: You can create multiple
Hostentries for the same server but with different configurations. For example:
Host prod-server
   Hostname production.example.com
   User deploy

Host prod-server-debug
   Hostname production.example.com
   User debug-user
   Port 10022
   IdentityFile ~/.ssh/id_rsa_debug
Now you can connect to the same production server with different credentials and ports using ssh prod-server and ssh prod-server-debug.
Command-Line Overrides: Remember that options specified directly on the ssh command line will typically override the settings in your config file. This gives you flexibility when you need to deviate from your usual configurations.
Final Thoughts: Embrace the Power of .ssh/config!
The .ssh/config file is a powerful yet often overlooked tool that can significantly improve your SSH workflow. By taking a few minutes to configure your connections, you can save yourself time, reduce errors, and enhance your security. Whether you’re a seasoned developer or someone who occasionally connects to remote servers, mastering .ssh/config is a skill that will pay dividends in the long run.
So, what are you waiting for? Open up your terminal, create or edit your ~/.ssh/config file, and start unlocking the superpowers of streamlined SSH connections!