Introduction
Welcome back, security enthusiasts! This marks the third installment in our series dedicated to the art and science of brute-force attacks. In our previous discussions, we’ve explored the fundamental principles of brute-forcing, and in our last blog, we delved into a practical application, demonstrating how to leverage OWASP ZAP against a Flask Python application. Today, we’re taking things a step further by focusing our attention on a classic target for penetration testing practice: the Damn Vulnerable Web Application (DVWA).
For those who are new to DVWA or need a refresher on getting it up and running, especially from your Kali Linux machine, I highly recommend checking out my previous blog post on how to run DVWA in Docker. This will ensure you have the perfect vulnerable environment ready for our exercise.
Similarly, if OWASP ZAP is a new tool in your arsenal, or you’d like to brush up on its core functionalities, please refer to my OWASP ZAP fundamentals blog. A solid understanding of ZAP’s basics will be invaluable as we navigate its powerful features for brute-forcing.
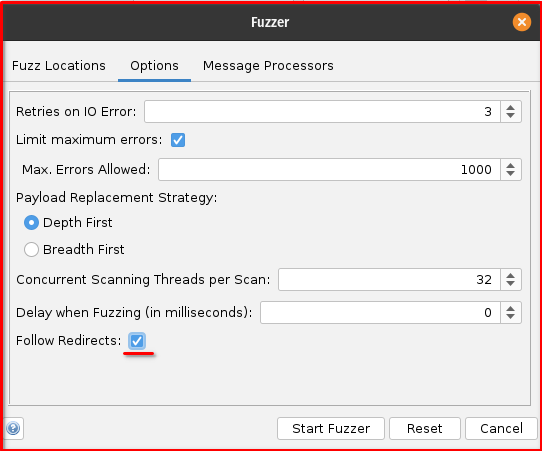
You’ll find that the process we’re about to undertake is quite similar to our previous brute-force exploration against the Flask Python application. The core mechanics of using OWASP ZAP’s Fuzzer remain consistent. However, a key difference in this installment will be the importance of enabling the “Follow Redirect” option within ZAP to accurately observe the end results of successful login attempts. This seemingly minor adjustment is crucial when dealing with web applications that redirect users upon successful authentication, as is often the case with DVWA. So, let’s dive in and uncover some credentials!
Let’s the Brute Force begins here
While I can explain the general process of using OWASP ZAP for brute-forcing, it’s crucial to understand that brute-forcing login pages without explicit permission is unethical and illegal. This information is provided for educational purposes only, specifically for authorized penetration testing on systems you own or have explicit permission to test.
DVWA (Damn Vulnerable Web Application) is designed to be vulnerable, making it a safe and legal environment to practice these techniques.
To leverage OWASP ZAP for a brute-force attack, we’ll guide it to intercept our application’s traffic and then utilize its Fuzzer feature.
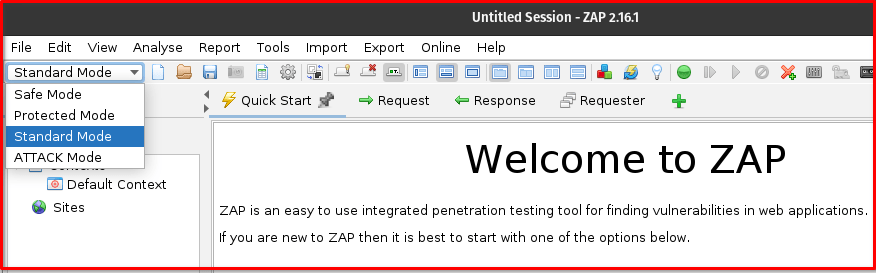
Step 1: Set ZAP to Standard Mode: Before you begin, ensure ZAP is operating in Standard Mode. The Fuzzer, which we’ll use for brute-forcing, is not available in “Safe” or “Protected” modes. You can change the mode via the “Mode” dropdown menu in the ZAP toolbar (typically top-left).
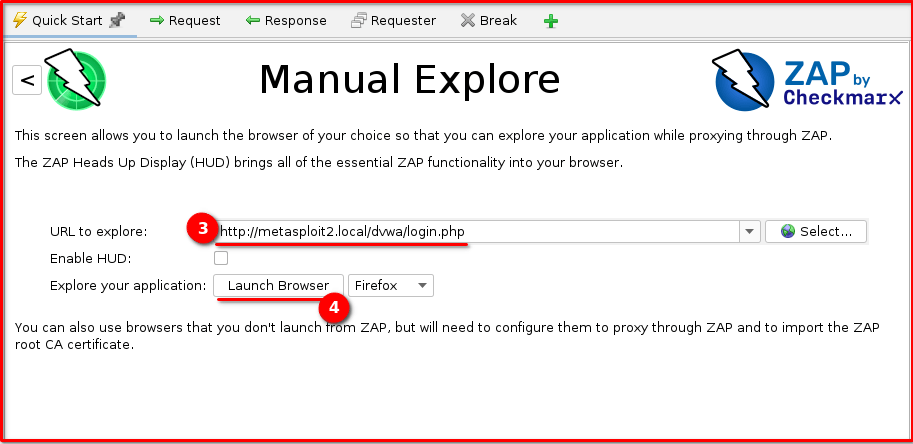
Step 2: Start Manual Explore: From the “Quick Start” tab in ZAP, select “Manual Explore.” This will allow ZAP to act as a proxy and capture your browser’s traffic.

Step 3: Navigate to the Login Page: In the “URL to Explore” field, enter http://metasploit2.local/dvwa/login.php (our damn vulnerable web application’s login URL | Your login URL might be different from mine here). A browser instance configured to proxy through ZAP will then pop up, navigating to this address.
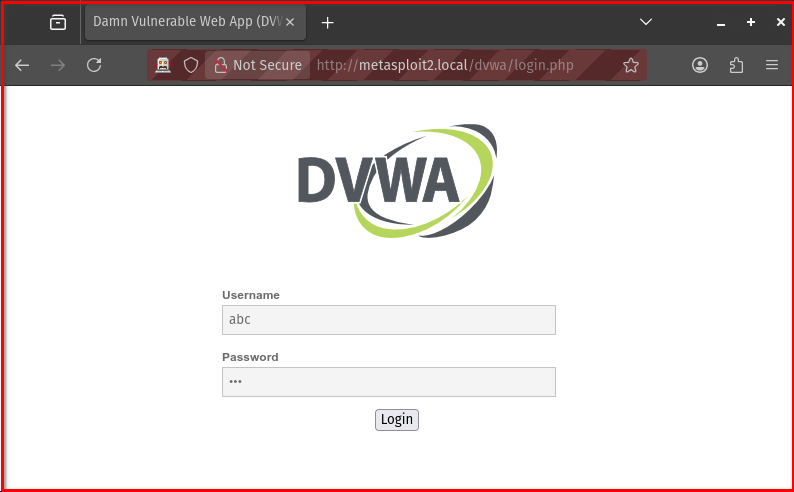
Step 4: Perform a Login Attempt: In the opened browser, enter any arbitrary (even incorrect) username and password (e.g., abc/xyz) into the Flask login page and submit the form. This action is crucial as it generates the HTTP POST request that ZAP needs to capture.
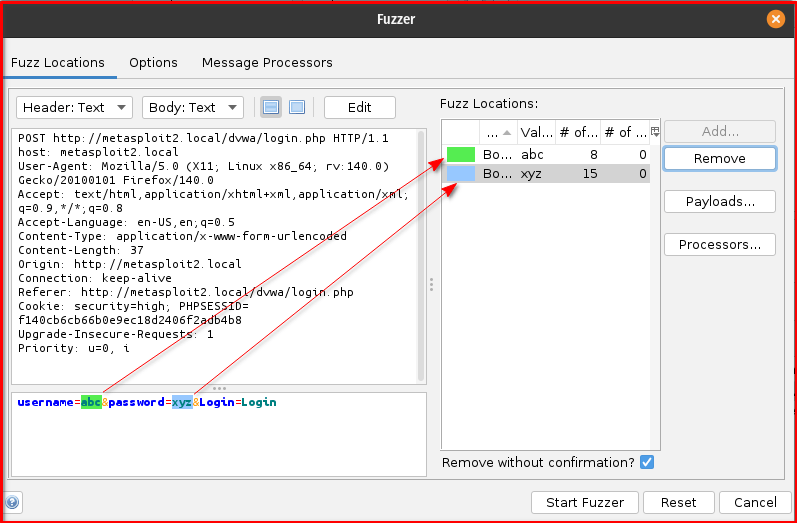
Step 5: Locate the POST Request in ZAP’s History: Switch back to the OWASP ZAP interface. In the “History” tab (usually on the left panel), locate the HTTP POST request that corresponds to your login attempt. This request will show the details of the form submission, including the username and password parameters.
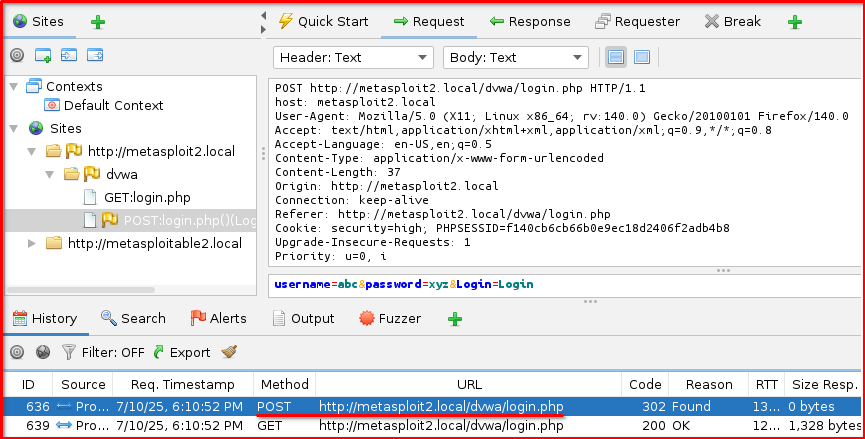
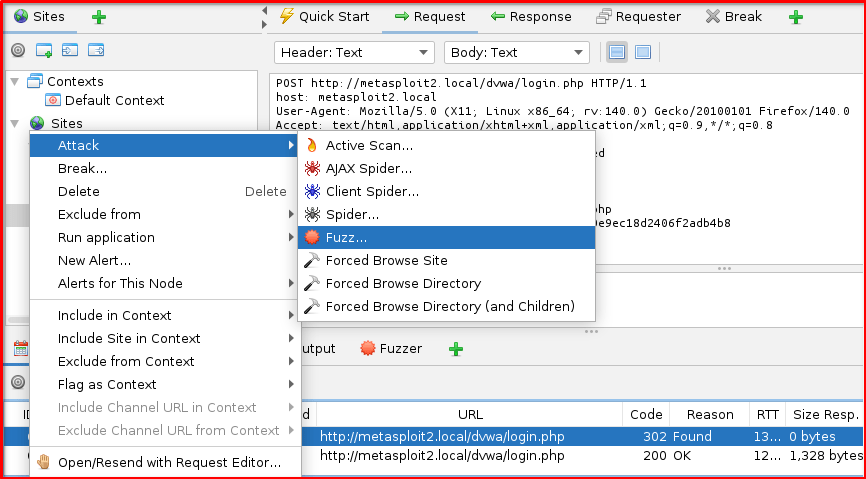
Step 6: Send to Fuzzer: Right-click on this identified POST request in the “History” tab and select “Fuzz…” from the context menu. This action will open the Fuzzer dialog, pre-populated with the captured request details.
Step 7: Identify Injection Points: In the Fuzzer dialog, you’ll see the raw request. Highlight the value of the username parameter (e.g., the test in username=test) and click the “Add” button to define it as an injection point. Repeat this process for the password parameter’s value (e.g., the test in password=test).
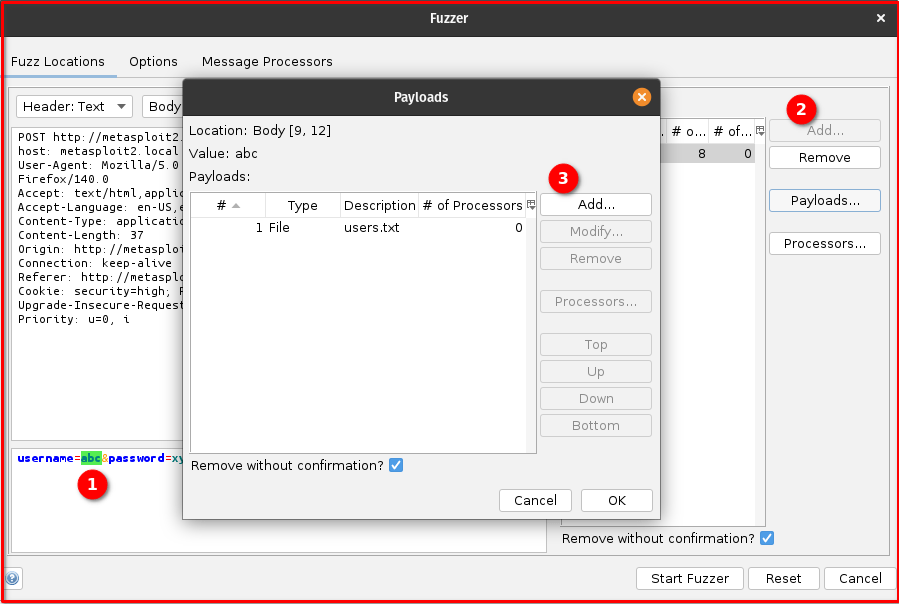
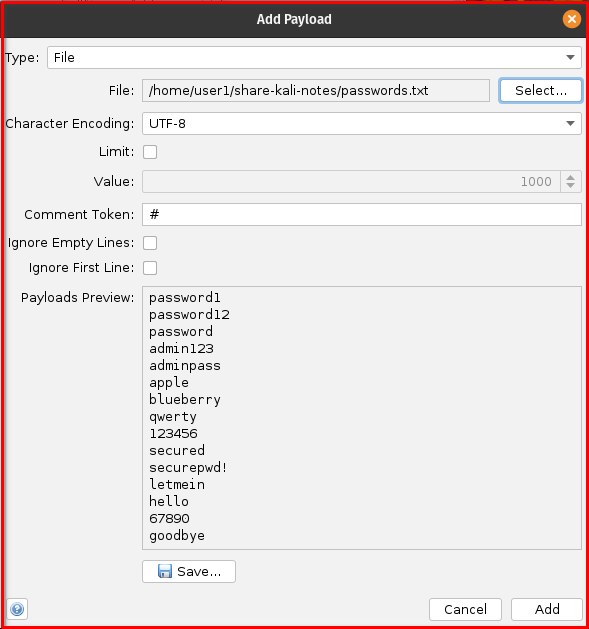
Step 8: Add Payloads (Usernames and Passwords): For each of the injection points you just defined (username and password):
- In the “Payloads” section of the Fuzzer dialog, click the “Add…” button.
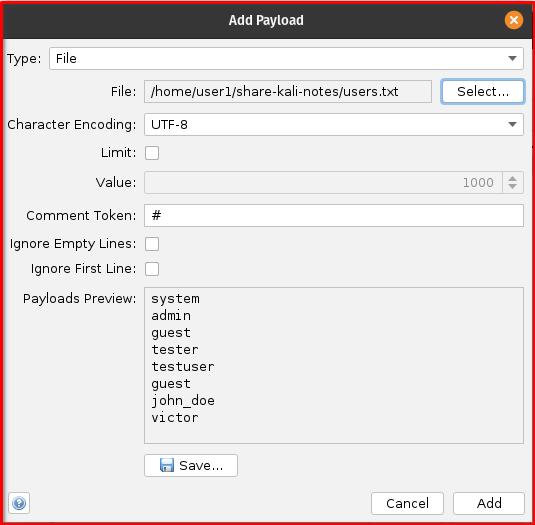
- Select “File” as the Payload Type.
- Browse and select your
users.txtfile for the username injection point and yourpasswords.txtfile for the password injection point. (Your users.txt should contain ‘admin’ and passwords.txt must contain ‘password’ string) - Click “Add” for each file.
Step 9: Enable ‘Follow Redirects on Fuzzer Options
Step 10: Start Fuzzing: Once all settings are configured, click the “Start Fuzzer” button. ZAP will then begin sending requests, trying all the combinations of usernames and passwords, and reporting the results in the Fuzzer tab based on your defined success/failure indicators. Pay close attention to the “Size Resp Body” columns tab for each result, to identify valid credentials.

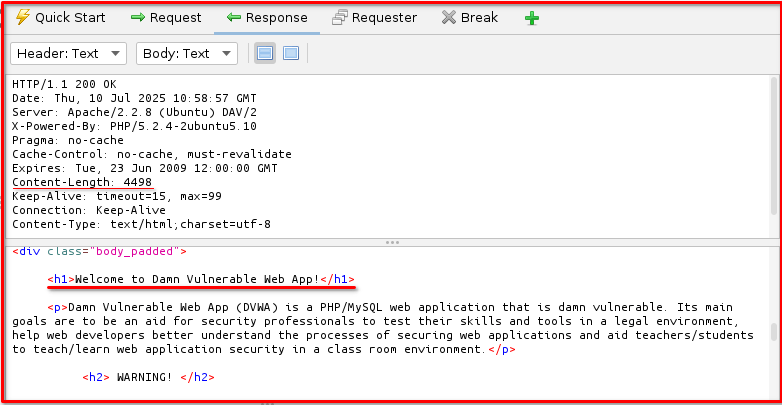
Observe Response Header and Body below.
Final Thoughts
And there you have it! We’ve successfully navigated the process of brute-forcing the DVWA login page using the versatile OWASP ZAP. By understanding how to effectively wield ZAP’s Fuzzer, configure payloads, and critically, how to interpret the results—especially by observing redirects—you’re now better equipped to identify and exploit this common vulnerability. Remember, the skills learned here on DVWA are invaluable for understanding real-world security weaknesses, but they should always be applied ethically and only in authorized environments