If you work in a terminal long enough, you end up doing the same slow ritual over and over: scrolling through files, hunting through shell history, or guessing at directory names. fzf changes that. It turns long lists into a fast interactive search box.
The idea is simple. Feed fzf a list, type a few characters, and pick what you want. That one habit can save a surprising amount of time every day.
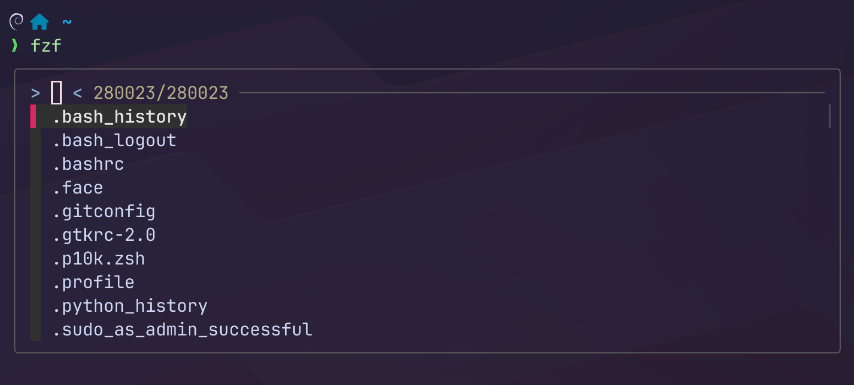
Screenshot: fzf file picker in terminal.
Tech Stack At A Glance
Before we dive in, here's what this walkthrough touches:
| Component | Role |
|---|---|
fzf |
The fuzzy finder itself — the star of the show |
bash / zsh |
Shells this post configures shortcuts and persistent config for |
bat (batcat on Debian/Ubuntu) |
Syntax-highlighted preview pane content |
tree |
Directory preview content for Alt-C |
ripgrep (rg) |
Fast content search piped into fzf |
git |
Branch picking and diff previews |
| APT / DNF | Package managers for Debian/Ubuntu and RHEL/Fedora respectively |
| EPEL | Extra repo needed on RHEL, Alma, Rocky, and CentOS Stream for fzf |
Everything below assumes a normal terminal-only workflow — no GUI package managers, no GUI text editors. Just shell config files and a package manager.
What FZF Actually Does
fzf is a fuzzy finder. It does not need full words. It matches fragments, so src can find server/src/main.go, and hs can find an old history command you barely remember.
It also understands a few search rules that help you steer results without memorizing a big query language. That balance is why it stays easy for beginners and still useful for power users.
At its core, it sits in the middle of a pipeline:
some-command | fzf | next-command
That makes it useful everywhere:
- file selection
- command history
- directory jumping
- git branch picking
- log and search result browsing
Under the hood, fzf reads newline-separated input from stdin, ranks matches as you type, and prints selected output to stdout. That means it fits Unix pipelines naturally and can wrap around almost any command.
Installation
fzf ships in the default repos for most modern distros, but the exact package name and extra steps depend on your family. Here's both paths.
Debian / Ubuntu (APT)
Debian 9+ and Ubuntu 19.10+ carry fzf directly in the default repos:
sudo apt update
sudo apt install fzf
That also happens to be the exact path used on this Debian 13 (Trixie) setup for this post. While you're at it, grab the two companion tools used for previews later in this post:
sudo apt install bat tree
On Debian and Ubuntu, bat installs its binary as batcat (there's a naming collision with an unrelated package called bat), so you'll need an alias — covered in the config section below.
RHEL / Fedora Family (DNF)
Fedora carries fzf natively:
sudo dnf install fzf
RHEL, AlmaLinux, Rocky Linux, and CentOS Stream don't ship fzf in the base repos — you need EPEL first. fzf has been available in EPEL 9 since late 2023, so on EL9-based systems:
sudo dnf install epel-release
sudo dnf install fzf
On EL7-based systems, use yum for the EPEL bootstrap instead:
sudo yum install epel-release
sudo yum install fzf
Grab the preview companions the same way:
sudo dnf install bat tree
On Fedora and EL-based systems, the bat binary is just bat — no batcat alias needed.
A Note On Package Manager Lag
Distro repos are convenient but can lag behind upstream fzf releases, especially on RHEL-family systems with longer release cadences. If you want bleeding-edge features, clone the repo directly and run the bundled installer instead:
git clone --depth 1 https://github.com/junegunn/fzf.git ~/.fzf
~/.fzf/install
The installer will interactively ask whether to set up key bindings and shell completion — say yes to both, and it'll patch your shell config for you. For this post, though, we're doing it manually so you know exactly what's happening.
Persistent Shell Integration
This is the part that turns fzf from "a command I sometimes remember" into muscle memory. You want it loaded every time you open a terminal, which means it belongs in your shell's startup file.
Zsh (~/.zshrc)
Add this line to load the built-in key bindings and completion:
source <(fzf --zsh)
That single line gives you:
Ctrl-Tfor files and pathsCtrl-Rfor historyAlt-Cfor directories
Bash (~/.bashrc)
Bash uses a slightly different invocation — eval instead of source <(...):
eval "$(fzf --bash)"
Same three shortcuts, same behavior, just bash's syntax for embedding the generated script.
A bat Wrapper (Debian/Ubuntu Only)
Since Debian and Ubuntu install the preview tool as batcat, you need something on $PATH named bat so the preview snippets later in this post work unmodified. Rather than an alias — which only exists in interactive shells and won't fire when fzf's preview window shells out to run the command — drop a small wrapper executable into ~/.local/bin:
mkdir -p ~/.local/bin
cat > ~/.local/bin/bat << 'EOF'
#!/bin/sh
exec /usr/bin/batcat "$@"
EOF
chmod +x ~/.local/bin/bat
Then make sure ~/.local/bin is on your PATH. Add this near the top of ~/.zshrc or ~/.bashrc if it isn't already there:
export PATH="$HOME/.local/bin:$PATH"That gives you a real bat binary that forwards straight to batcat, so it works the same whether fzf calls it from an interactive shell, a script, or a preview subprocess. Skip this step entirely on RHEL/Fedora, where the binary is already just bat.
Baseline Config (Works In Either Shell)
Drop this block into ~/.zshrc or ~/.bashrc — the syntax is the same in both shells:
export FZF_DEFAULT_OPTS='--height 40% --layout=reverse --border --info=inline'
export FZF_CTRL_T_OPTS="--preview 'bat --style=numbers --color=always {}' --bind 'ctrl-/:change-preview-window(down|hidden|)'"
export FZF_CTRL_R_OPTS="--preview 'printf \"%s\\n\" {2..}' --bind 'ctrl-/:change-preview-window(down|hidden|)'"
export FZF_ALT_C_OPTS="--preview 'tree -C {}' --bind 'ctrl-/:change-preview-window(down|hidden|)'"
This gives you a compact picker, reversed list order, and live previews for files, history entries, and directories, all with Ctrl-/ to toggle the preview pane on and off.
Once you've added the integration line, the alias (if needed), and the options block, reload your shell to pick up the changes:
source ~/.zshrc    # or
source ~/.bashrc
Search Syntax That Matters
fzf does more than fuzzy matching. A few patterns go a long way:
^foomatch prefixbar$match suffix'wordexact match!wordexclude matcha brequire both terms
Examples:
git branch | fzf --query '^feat'
find . -type f | fzf --query '.md$'
For file search, --query is a good training tool. It forces you to think in short fragments instead of browsing the full list.
A Better Mental Model
Think of fzf as a filter with three layers:
- input source
- interactive ranking
- output selection
That means the real skill is not remembering one command. It is learning how to plug fzf into the commands you already use.
Common input sources:
findrggitpshistory
Common output destinations:
vimlesscpcdgit checkout
Add Previews
Preview is where fzf becomes more than a picker. It becomes a tiny terminal UI.
Examples (using the plain bat command — remember the alias if you're on Debian/Ubuntu):
find . -type f | fzf --preview 'bat --style=numbers --color=always {}'
git status --short | fzf --preview 'git diff --color=always -- {2}'
Previews help you inspect before you commit to a choice.
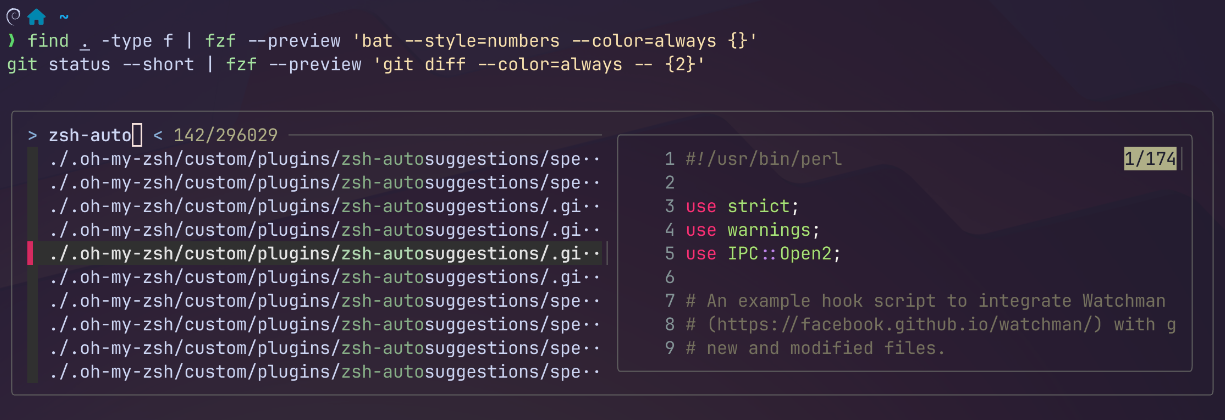
Screenshot: preview window showing file content.
Daily Practice
Use fzf for 10 minutes a day.
Drill 1: File Search
find . -type f | fzf
Goal: find files with 2 to 4 typed characters.
Drill 2: History Search
Press Ctrl-R.
Goal: recover 3 old commands without using arrow keys.
Drill 3: Directory Jump
Press Alt-C.
Goal: move into 5 directories you visit often.
Drill 4: Path Insert
Press Ctrl-T.
Goal: insert paths into vim, less, and cp.
Drill 5: Exact Search
git branch | fzf --query '^main'
find . -type f | fzf --query '.go$'
Goal: feel difference between fuzzy and exact matching.
Drill 6: Search Code
rg --line-number --color=always "TODO|FIXME" . | fzf --ansi
Goal: use fzf on search results, not only file names.
Final Thought
fzf is not a flashy tool. It is a force multiplier. Once the shortcuts become muscle memory, it starts disappearing into your workflow, which is exactly why it is so useful.
Start with Ctrl-T, Ctrl-R, and Alt-C. Keep the drills small. After a week, it will feel natural.